![MicrosoftTeams-image6f6e78ac5251452f5e9d5419521926001b2457277276701c3aff0c935893efe05f359183e579e81145254f68fa804b37b1631dcaf07986d136aeb8e94ed62bd3.png]](https://support.mediroutes.com/hs-fs/hubfs/MicrosoftTeams-image6f6e78ac5251452f5e9d5419521926001b2457277276701c3aff0c935893efe05f359183e579e81145254f68fa804b37b1631dcaf07986d136aeb8e94ed62bd3.png?height=50&name=MicrosoftTeams-image6f6e78ac5251452f5e9d5419521926001b2457277276701c3aff0c935893efe05f359183e579e81145254f68fa804b37b1631dcaf07986d136aeb8e94ed62bd3.png)
Before Setting Up Timekeeping
-
Schedule a training session with employees prior to enabling Timekeeping in MediRoutes Desktop or Mobile App.
-
Once Timekeeping is activated, drivers will immediately gain access to these features the next time they log in—so training should be completed before activation.
Step 1 — Enable Timekeeping Access for Each Employee (Desktop App)
-
Navigate to Admin.
-
Open Employee.
-
Select Edit User for the employee you want to update.
-
Check the box Allow Driver Timekeeping.
-
Click Save.
Important Note:
Once Allow Driver Timekeeping is enabled:
The next time a driver logs in to the MediRoutes Mobile App, the Timekeeping menu will appear.
Ensure the driver has been trained before this setting is turned on.
After enabling this setting, drivers can access Timekeeping features, including shift tracking and break management.
Timekeeping Break Options for Employees
MediRoutes supports two methods for managing breaks:
-
Driver-Initiated Breaks (from the Mobile App)
-
Scheduled Breaks (inserted by Dispatcher/Scheduler)
Option 1 — Driver-Initiated Breaks from the Mobile App
Step 1 — Enable Driver-Initiated Breaks in MediRoutes Desktop
To allow drivers to start and end their own breaks:
-
Go to Data > Other > Settings.
-
In the dropdown list, select allowdriverinitiatedbreak.
-
Change the value to true.
-
Click Update.
Once enabled, drivers will be able to initiate their own break start and end times directly within the Mobile App.
Mobile App Driver Initiated Break steps.
How Drivers Start and End a Break in the Mobile App
To Start a Break
-
Open the Main Menu.
-
Select Timekeeping.
-
Choose Start Break.
-
The start time is recorded at the moment the button is pressed.
-
To End a Break
Drivers can end their break in two ways:
Option A — Through Timekeeping Menu
-
Open the Main Menu.
-
Select Timekeeping.
-
Choose End Break.
Option B — Through the Schedule
-
Open Schedule.
-
Select the End Break event.
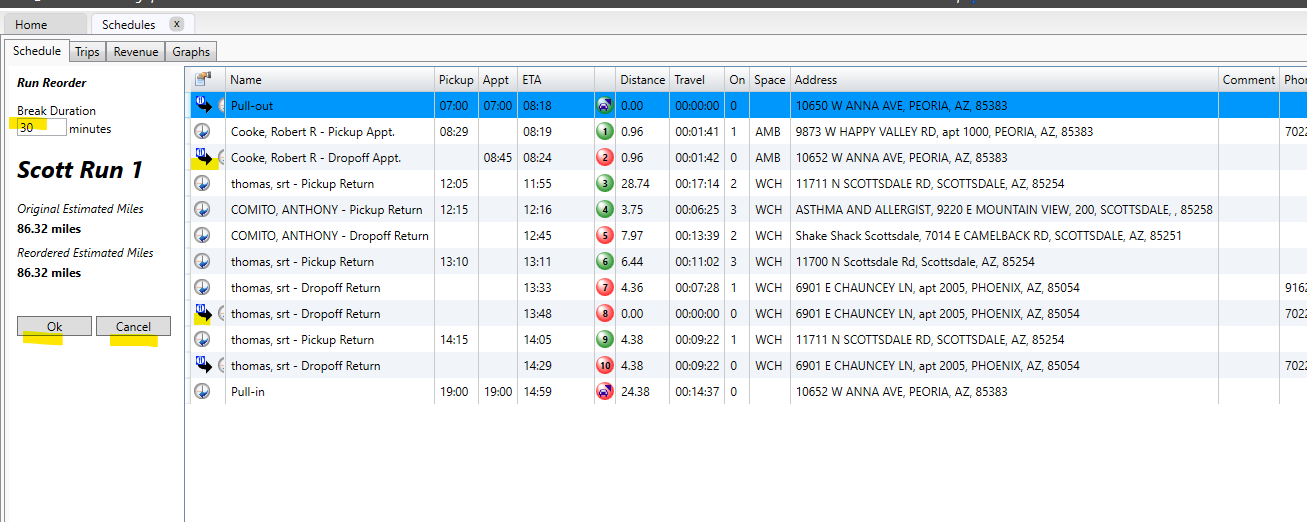
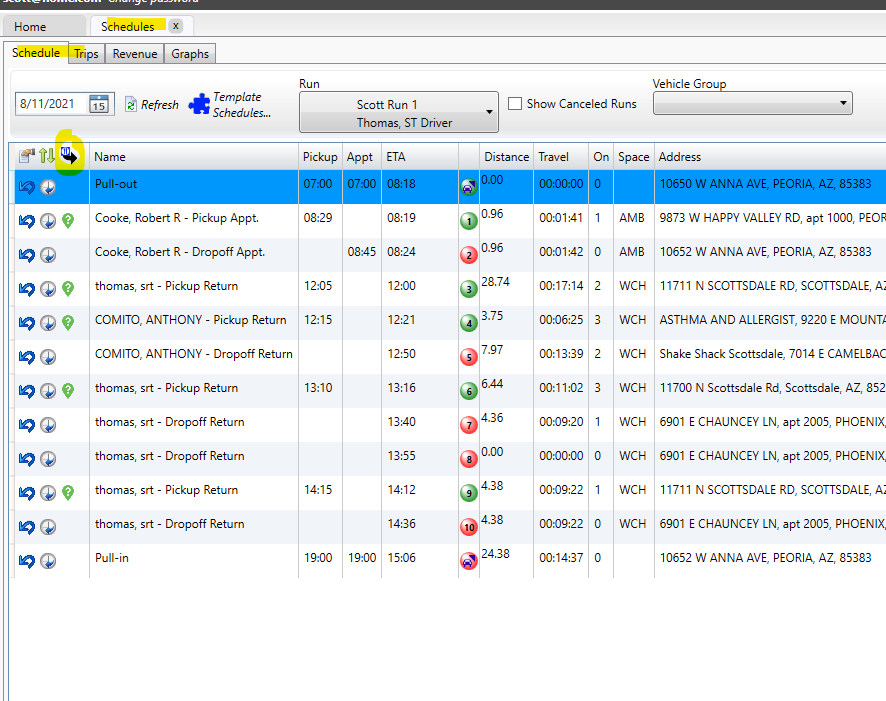
Option 2 – Insert a Break event for a future schedule.
This option will allow a Dispatcher/Scheduler to insert a Break event into a future schedule.
Steps to insert a Break:
-
After scheduling is complete, go to the Schedule tab.
-
Select the Run where you want to add a break.
-
Click the Insert Break icon.
-
The Trip Reorder screen will appear, displaying available timeslots for inserting a 30-minute break based on ETA times.
-
Select the Break icon next to the position where the break should be placed.
-
Click OK to insert the break.
-
If you select Cancel, you may restart the process.
-
Once inserted, the Break will:
-
Appear as a scheduled event in the run
-
Be performed like any other trip
-
Be movable within the schedule like standard trip entries