![MicrosoftTeams-image6f6e78ac5251452f5e9d5419521926001b2457277276701c3aff0c935893efe05f359183e579e81145254f68fa804b37b1631dcaf07986d136aeb8e94ed62bd3.png]](https://support.mediroutes.com/hs-fs/hubfs/MicrosoftTeams-image6f6e78ac5251452f5e9d5419521926001b2457277276701c3aff0c935893efe05f359183e579e81145254f68fa804b37b1631dcaf07986d136aeb8e94ed62bd3.png?height=50&name=MicrosoftTeams-image6f6e78ac5251452f5e9d5419521926001b2457277276701c3aff0c935893efe05f359183e579e81145254f68fa804b37b1631dcaf07986d136aeb8e94ed62bd3.png)
Creating Capacities:
Before you create any Capacities, Space Types must be setup. Click the link below to see how to set up/edit Space types.
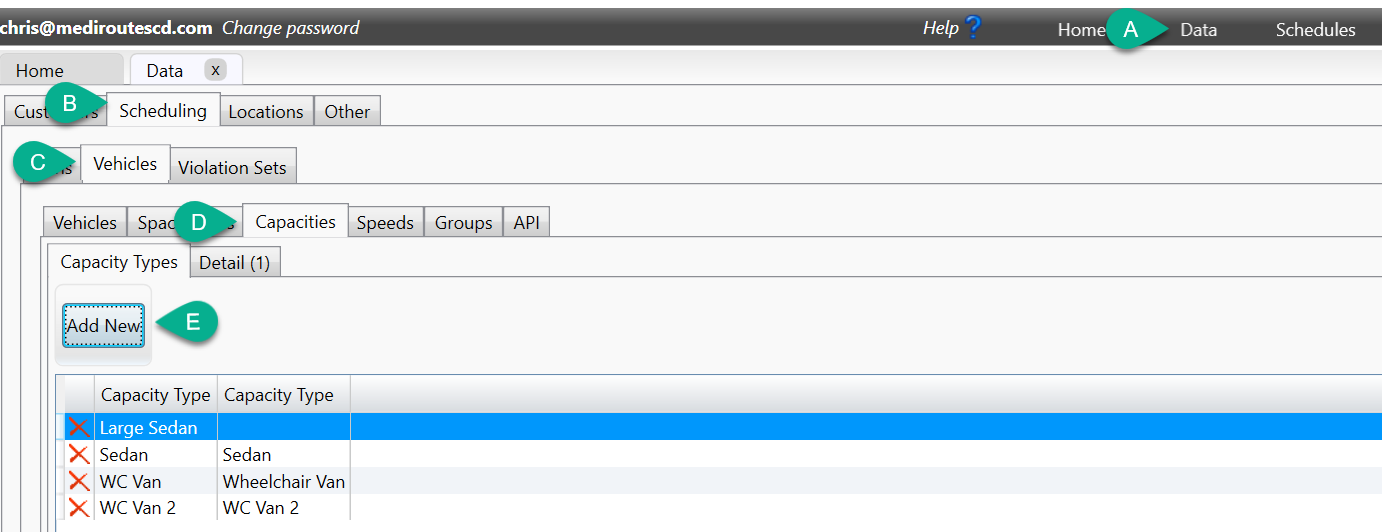
Step 1- Navigate to Capacities and Create a New Capacity Type
A – Click on the Data tab.
B - Click on the Scheduling tab.
C – Click on the Vehicles tab.
D – Click on the Capacities tab.
E - Click Add New in the top left of that tab to add a new Capacity Type.
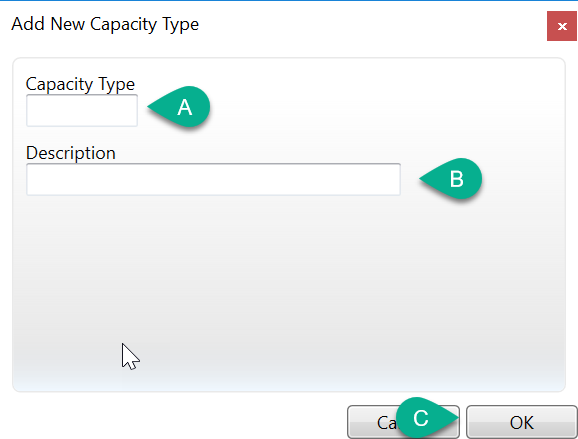
Step 2 - Name the New Capacity Type
A – Enter a Name for the Capacity Type
B – Enter a Description (Optional)
C – Click on OK to save the capacity type.
Step 3 – Configure the Capacity Type
Highlight the capacity you want to work with by clicking on it, then click on the Detail tab at the top.
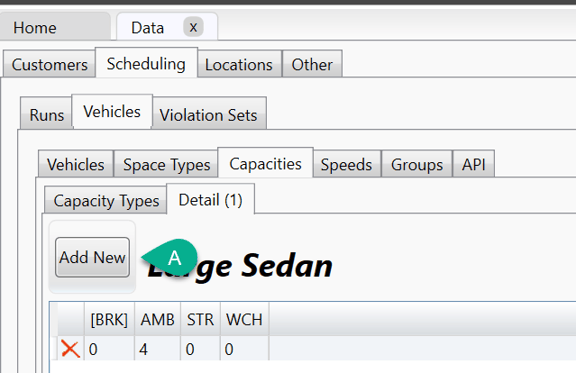
A - Click on Add New to define any additional configurations that would be required. Sometimes only one is needed. To add the values, double-click in each Space Type box and type in the number of passengers/seats. Review the information below to configure your capacity types.
- Each line of a capacity type represents a different maximum configuration of the vehicle. (Maximum configuration meaning the maximum number of available seats for passengers of each Space Type. For example, a standard minivan that can only take ambulatory passengers would have a configuration of 6 in the AMB column.)
- Start by entering the maximum number of passengers for the highest level of service the vehicle provides.
- Within the same line, enter the number of other passengers that can be on the vehicle simultaneously.
- Ask the question, "If I have fewer of my highest level of service passengers, can I fit additional passengers?"
- If the answer is yes, add a new line, enter one less passenger for the highest level of service the vehicle provides, then on the same line, enter the number of other passengers that can be on the vehicle simultaneously.
- If the answer is no but there are other service levels the vehicle provides, add a new line. Enter the maximum number of passengers for that level of service as described above. (Review previous steps.)
- If the answer is no and there are no other service levels the vehicle provides, you are done with the configuration.
See example below of a completed capacity type configuration:

In this example, the bus can take a total of 7 ambulatory passengers, but if they take a wheelchair passenger, then only 4 ambulatory passengers will fit with the wheelchair passenger on board.
Revised Date: 9/26/24 ARB