![MicrosoftTeams-image6f6e78ac5251452f5e9d5419521926001b2457277276701c3aff0c935893efe05f359183e579e81145254f68fa804b37b1631dcaf07986d136aeb8e94ed62bd3.png]](https://support.mediroutes.com/hs-fs/hubfs/MicrosoftTeams-image6f6e78ac5251452f5e9d5419521926001b2457277276701c3aff0c935893efe05f359183e579e81145254f68fa804b37b1631dcaf07986d136aeb8e94ed62bd3.png?height=50&name=MicrosoftTeams-image6f6e78ac5251452f5e9d5419521926001b2457277276701c3aff0c935893efe05f359183e579e81145254f68fa804b37b1631dcaf07986d136aeb8e94ed62bd3.png)
Creating A Customer
Step 1- Click on New Customer in Home Screen
A - Click on New Customer (This is located in the top left area of your Home tab screen.)

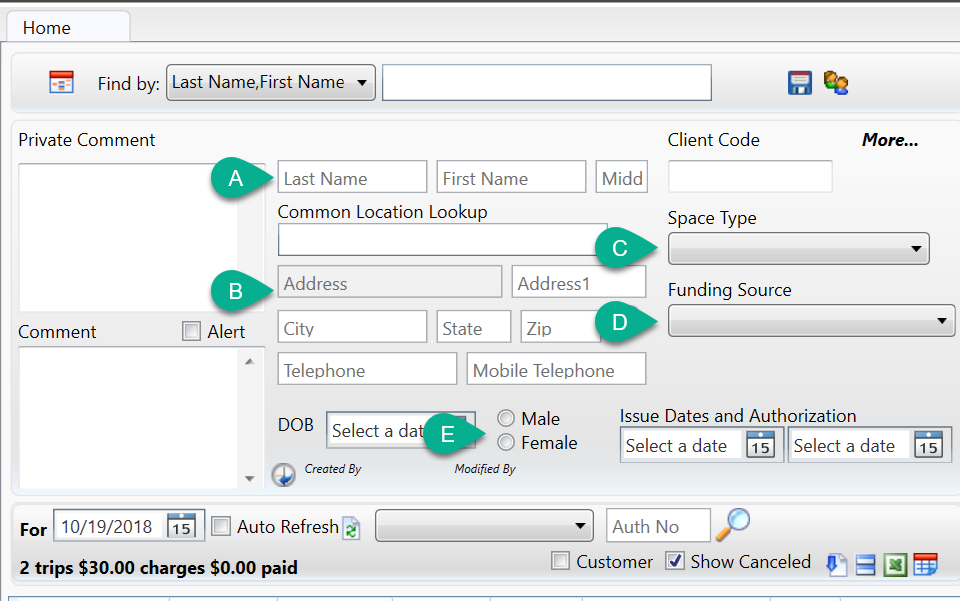
Step 2 - Enter Required Customer Information
A - Enter First and Last Name
B - Enter the Address
Note: Enter the street address, city and state OR zip code. Once entered click the magnifying glass icon to geocode the address.
C - Use the drop-down list to pick the Space Type.
D - Use the drop-down list to pick the Funding Source.
E - Click the radio button for gender.
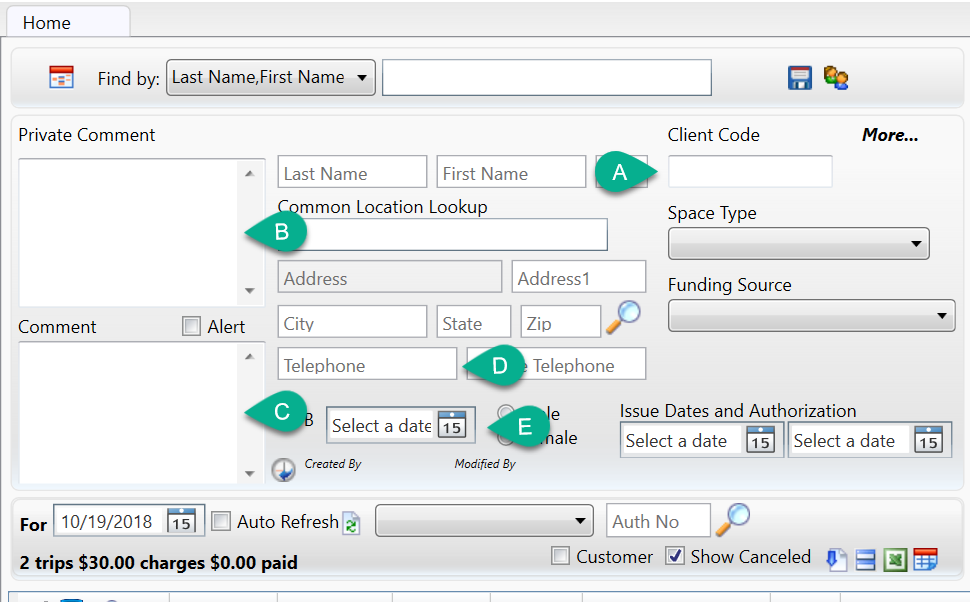
Step 3 – Non-required information
A - Client Code is a unique ID associated with the customer. Generally, a Medicaid or Broker ID is used for the Client Code.
B - Private Comment is where to enter comments that schedulers and dispatchers might need.
C - Comment is where to enter comments that the driver might need.
D - Telephone and Mobile phone numbers can be added.
E - Date of Birth can be entered if needed.
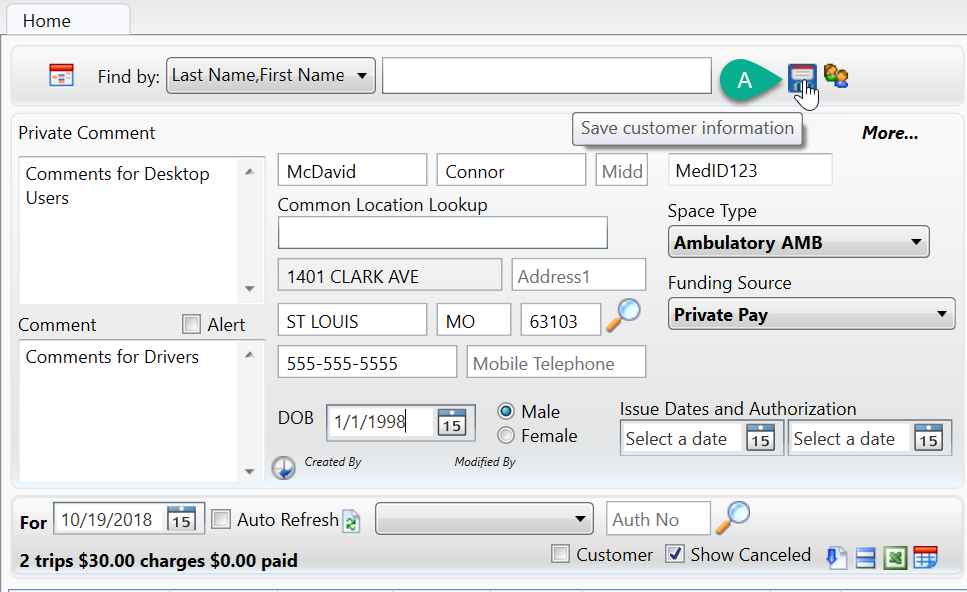
Step 4 – Save the new client by clicking the blue disk next to the new customer icon.
A - Click the Save Button to Save the Customer/Passenger Record.
Once you save the customer, the trip entry panels will show on your screen by default so you can enter the first trip for that customer.
Revised Date: 9/23/24 ARB