![MicrosoftTeams-image6f6e78ac5251452f5e9d5419521926001b2457277276701c3aff0c935893efe05f359183e579e81145254f68fa804b37b1631dcaf07986d136aeb8e94ed62bd3.png]](https://support.mediroutes.com/hs-fs/hubfs/MicrosoftTeams-image6f6e78ac5251452f5e9d5419521926001b2457277276701c3aff0c935893efe05f359183e579e81145254f68fa804b37b1631dcaf07986d136aeb8e94ed62bd3.png?height=50&name=MicrosoftTeams-image6f6e78ac5251452f5e9d5419521926001b2457277276701c3aff0c935893efe05f359183e579e81145254f68fa804b37b1631dcaf07986d136aeb8e94ed62bd3.png)
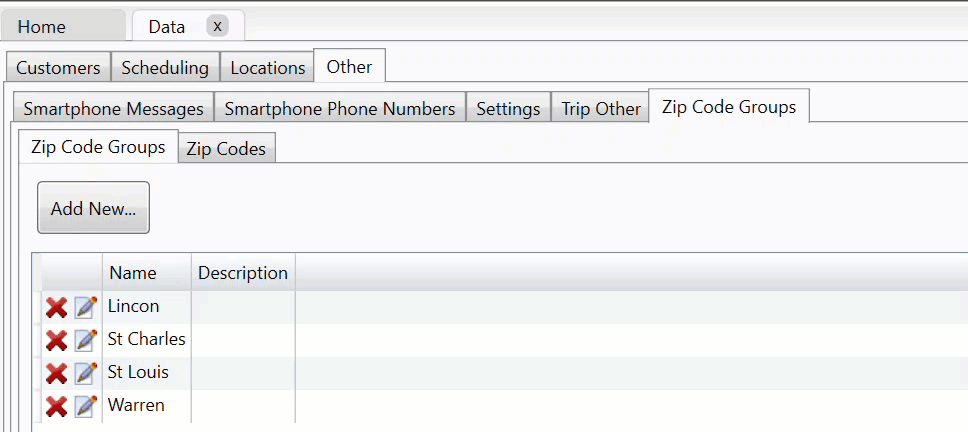
Step 1 - Navigate to Zip Code Groups and Add New Zip Code Group
A - Click on Data link
B - Click on Other Tab
C - Click on Zip Code Groups
D - Click on Add New

Step 2 - Name Zip Code Group
A - Enter a Name for the Zip Code Group
B - Enter a Description (Optional)
C - Click OK to save

Step 3 - Configure Zip Code Group
Highlight the zip code group you want to configure, and then click the 'Zip Codes' tab
A - Use the drop down Select States and checkmark the state or states the zip code group is in.
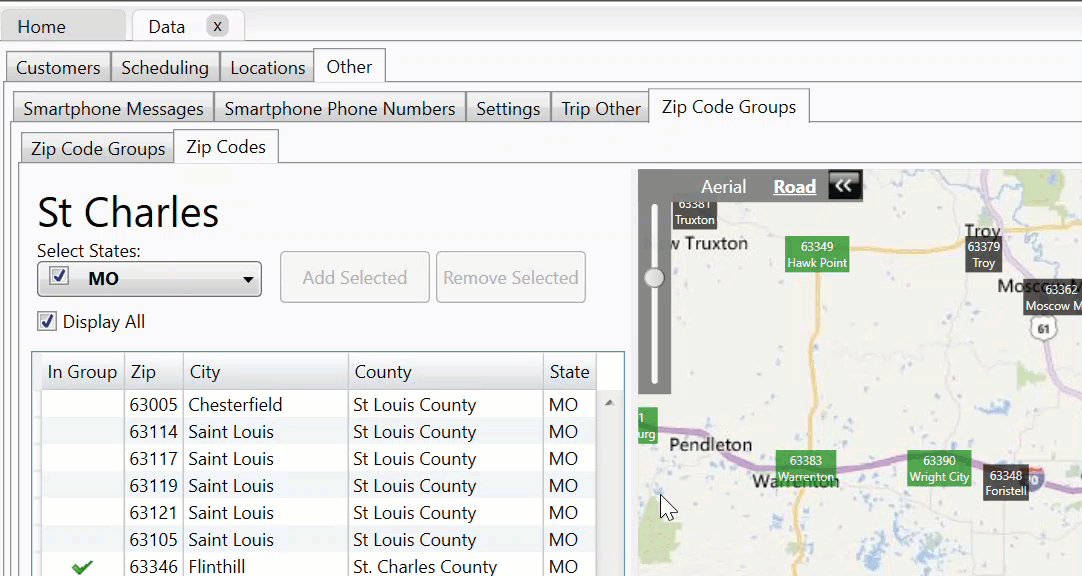
B - Highlight the Zip Codes to include in the group. Click, Control+Click or Shift+Click, to select the zip codes to include in that group.
Tip: Column headers (Zip, City, County, etc.) are clickable to sort ascending or descending. This is especially helpful to ensure all zip codes are included for a particular county/city.
C - When the desired zip codes are selected, click Add Selected.
D - To remove one or more zip codes from the group, highlight the zip codes (Control+Click or Shift+Click for multiple) and click Remove Selected.
E - Once an initial set of zip codes have been added, click the Display All checkbox to show all zip codes for the state on the map.
- Zip Codes in your group will display on the map in black.
- Zip Codes you have selected, but not yet added to your zip code group will display on the map in blue.
- Zip Codes you have added to your group and selected to be removed, will display on the map in red.
- Zip Codes not selected and not added to your group will display on the map in green.
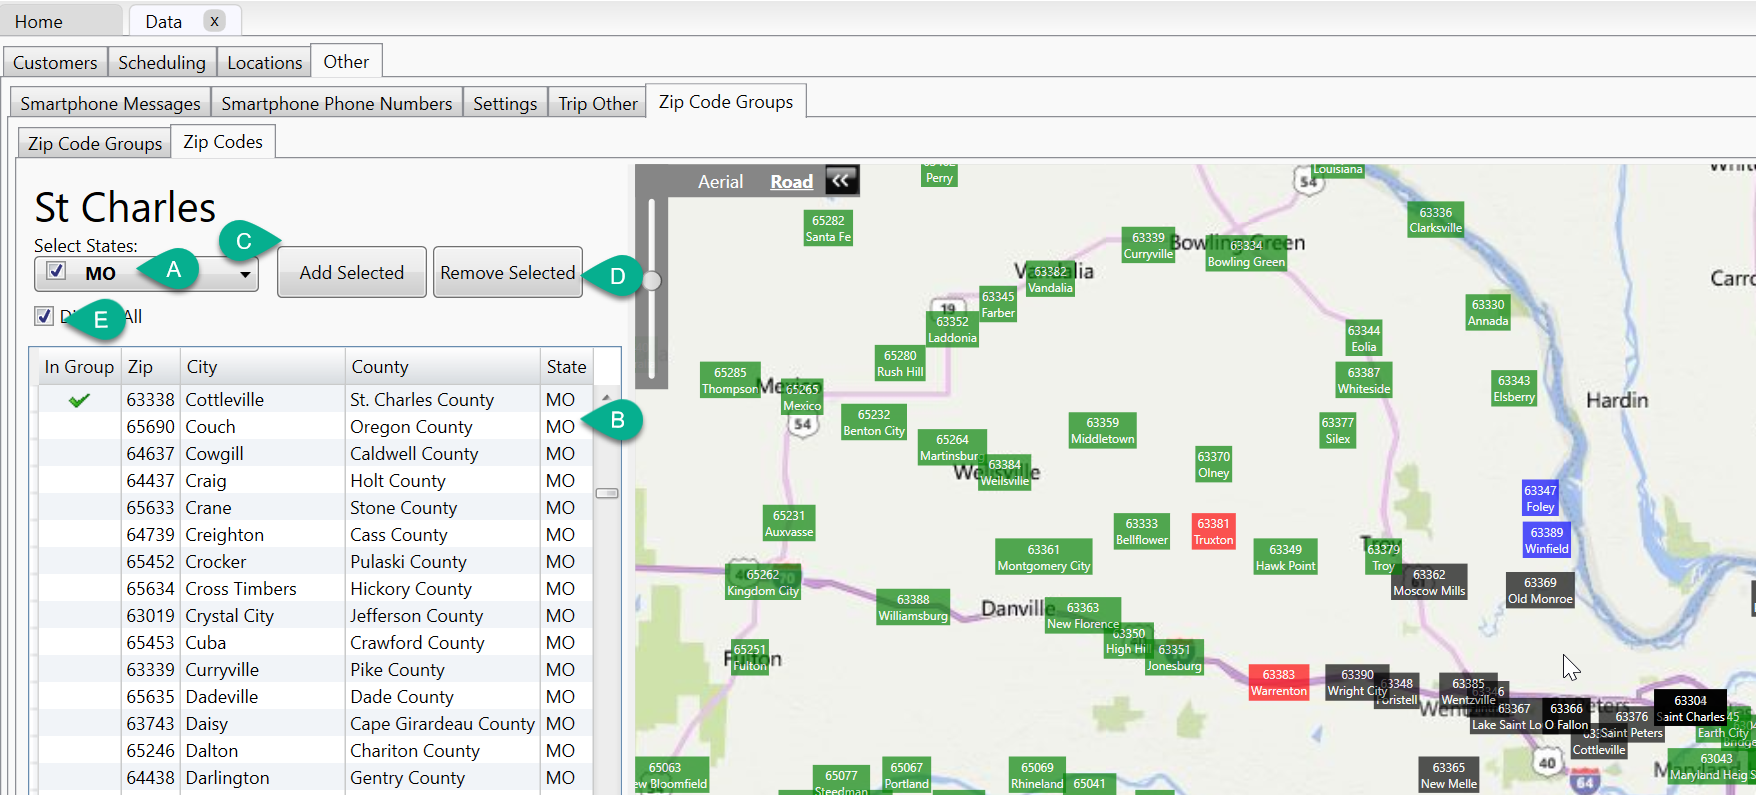
- You can click on the zip codes on the map to add and remove them from your group.
Revised Date: 9/10/24 ARB