![MicrosoftTeams-image6f6e78ac5251452f5e9d5419521926001b2457277276701c3aff0c935893efe05f359183e579e81145254f68fa804b37b1631dcaf07986d136aeb8e94ed62bd3.png]](https://support.mediroutes.com/hs-fs/hubfs/MicrosoftTeams-image6f6e78ac5251452f5e9d5419521926001b2457277276701c3aff0c935893efe05f359183e579e81145254f68fa804b37b1631dcaf07986d136aeb8e94ed62bd3.png?height=50&name=MicrosoftTeams-image6f6e78ac5251452f5e9d5419521926001b2457277276701c3aff0c935893efe05f359183e579e81145254f68fa804b37b1631dcaf07986d136aeb8e94ed62bd3.png)
Creating Custom Trip Sheet Report Formats
Step 1 - Navigate To Custom Reports Page Setup Tab and Edit a Custom Trip Sheet
A - Navigate to the Reports tab
B - Go to the Page Setup Tab
C - Click the Custom Report Definitions box and use the Edit Button next to the format that you would like to edit. (You can edit any of the default formats listed here to turn it into your custom format.)
D - If you need to start fresh with a blank format, you can click Add New.

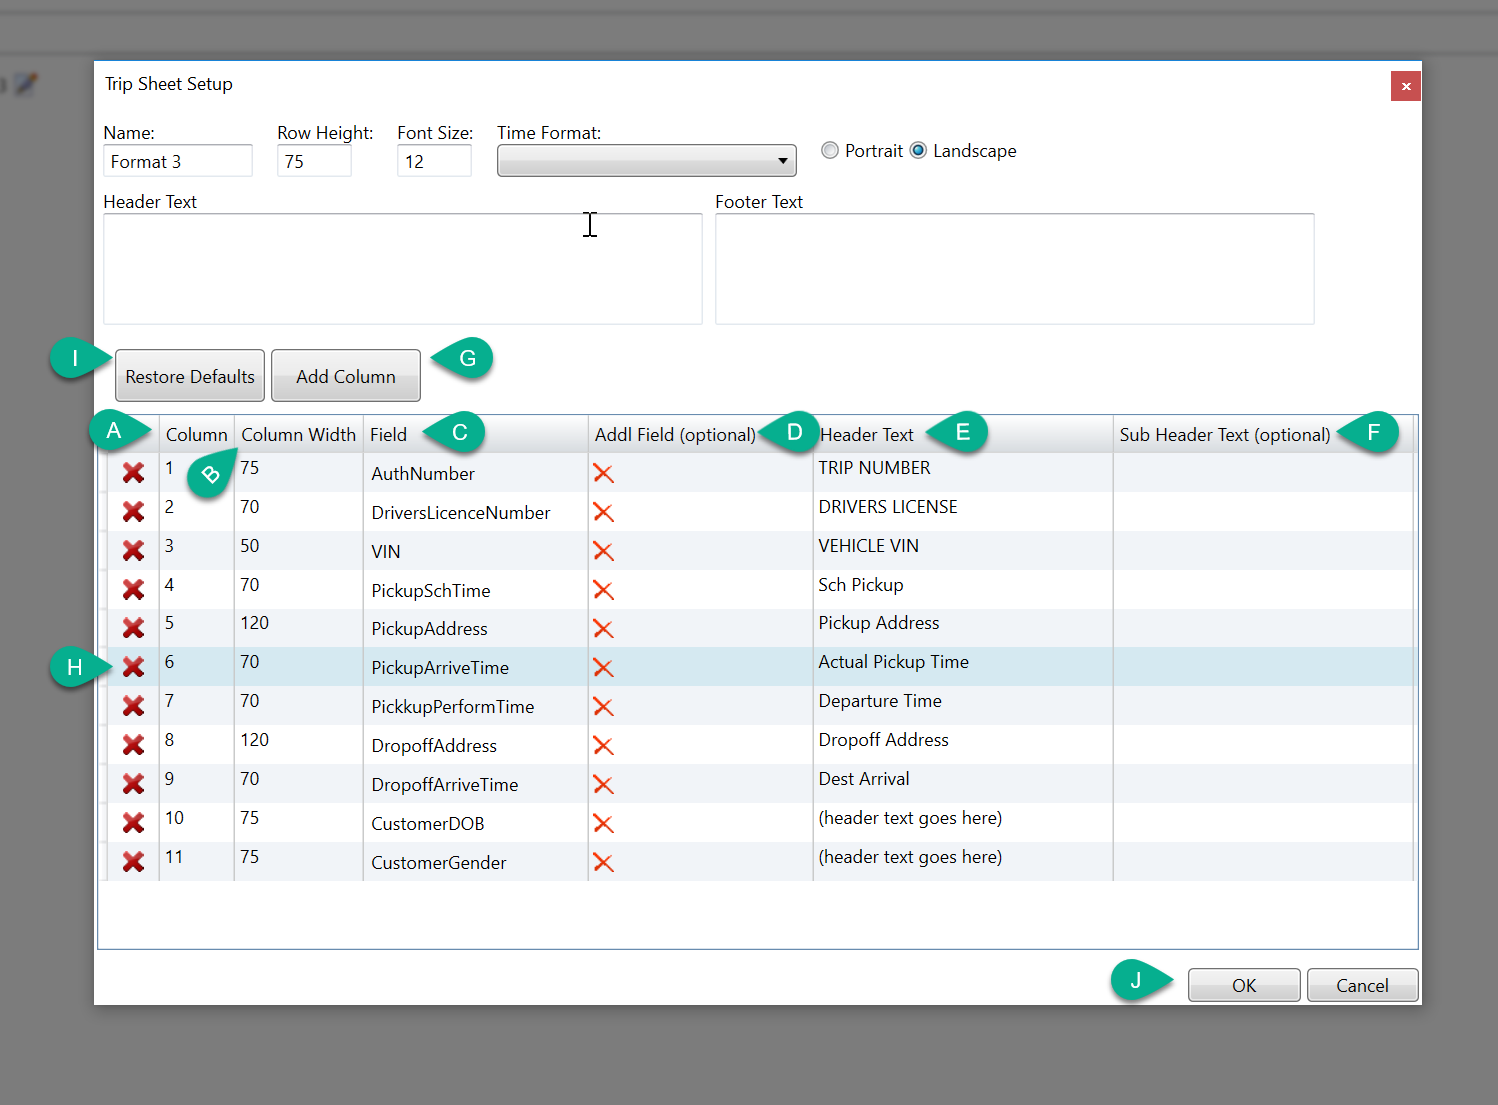
Step 2 - Customize Format of Trip Sheet
Within the pop-up that displays there are several options to customize the format of the trip sheet.
A - Name: Fill this out to make it easier to identify what this custom trip sheet is used for.
B - Row Height: Controls the size of the rows in the trip sheet. A larger number will make for fewer trips per sheet, whereas a larger number will make for more trips per sheet.
C - Font Size: Controls the size of the font. A larger number will mean larger text on your trip sheet, a smaller number will mean smaller text
D - Time Format: Whether time should be displayed in standard 12hr time or 24hr time.
E - Print Layout: Changes how the trip sheet should be orientated when printing.
F - Header Text: Will display the entered text at the top of each trip sheet
G - Footer Text: Will display the entered text at the bottom of each trip sheet.

Step 3 - Customize the Content of the Trip Sheet
The bottom half of the pop-up is where you can control what data displays on the trip sheet and the layout of the columns within your trip sheet.
A - Column: Double-Click and drag on any row to change the order of the columns on your trip sheet.
B - Column Width: This controls how wide each column is, with a larger number indicating a larger column size. Double-click inside each box to change.*
*For the last column on your sheet, it will be as large as you have space remaining.
C - Field: Double-click within each row to select what MediRoutes data element will display on the trip sheet.
D - Addl Field: In some cases, you will want two values displayed within the same field. Double click within this box if you would like two data elements displayed within the same field.
E - Header Text: This is what will display on the column header of your trip sheet.
F - Sub Header Text: A secondary header displayed in smaller text on your trip sheet.
G - Add Column: Use this if you would like additional columns added to your trip sheet
H - Delete Column: Use the bold red x icon to delete a column from your trip sheet.
I - Restore defaults: This will restore your format to the default MediRoutes Settings.
J - Once you have completed your customization, press OK to save your changes.
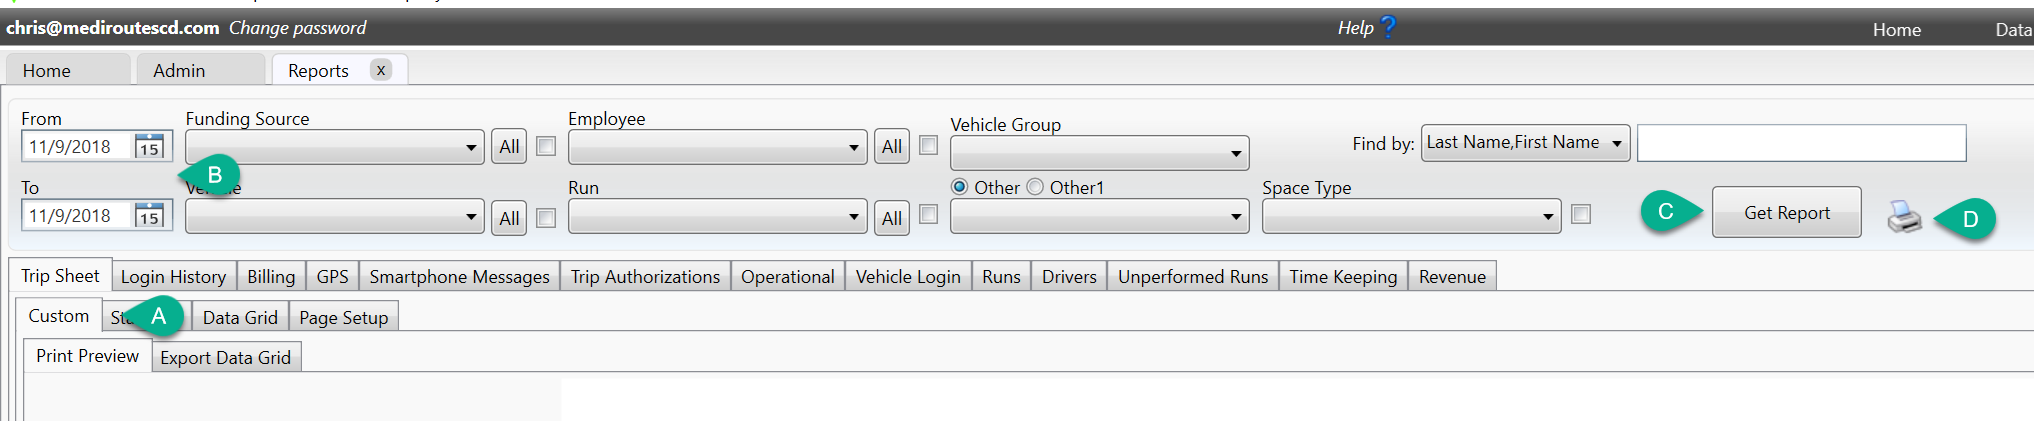
Step 4 - Previewing and Printing a Custom Trip Sheet
A - Navigate to Reports > Trip Sheet > Custom
B - Select the date range for your report.
C - Click Get Report.
D - Use the printer icon to send your report to paper or to create a pdf*.
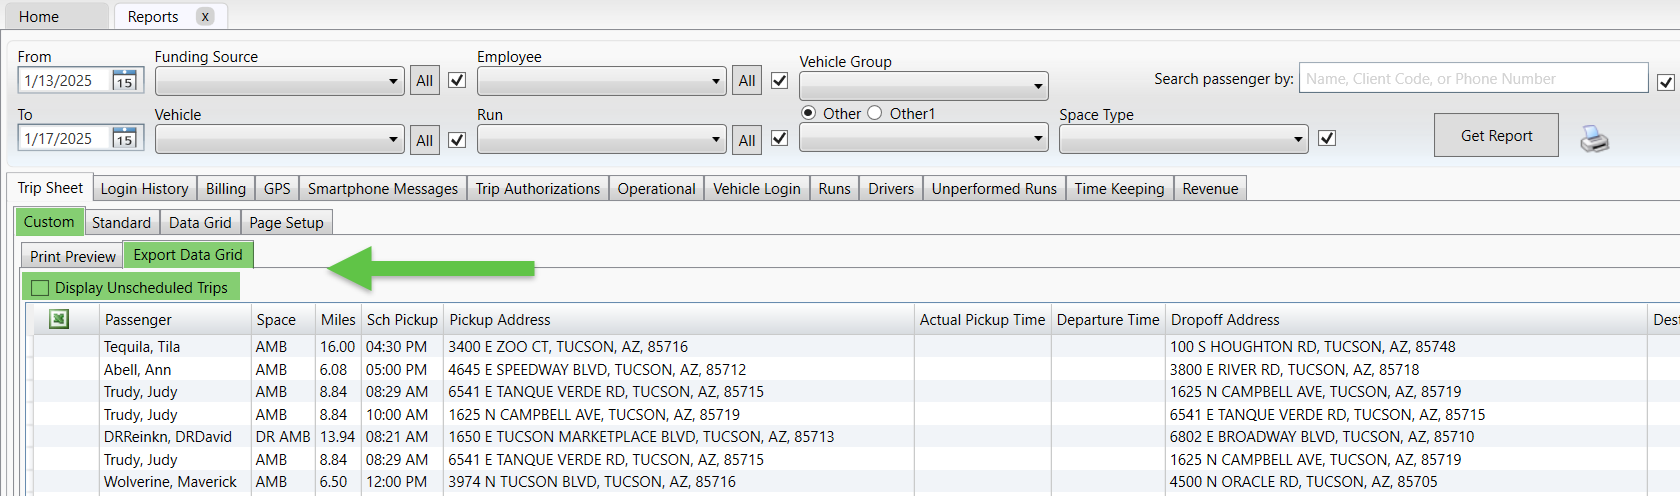
Exporting the EXPORT DATA GRID tab will display the columns in the Custom Trip Sheet format in an Excel spreadsheet view (in CSV format upon export). This feature allows you to select specific columns for export, as opposed to all the columns in the Trip Sheet > Data Grid tab, which contains extensive trip information. Trips that are assigned a RUN will show first, but you can check the Display Unscheduled Trips check box to see all trips for that day (highlighted below).
*Most of the Trip Sheet formats are landscape orientation. Make sure to adjust your printer settings to landscape within the printer dialog pop-up before printing.
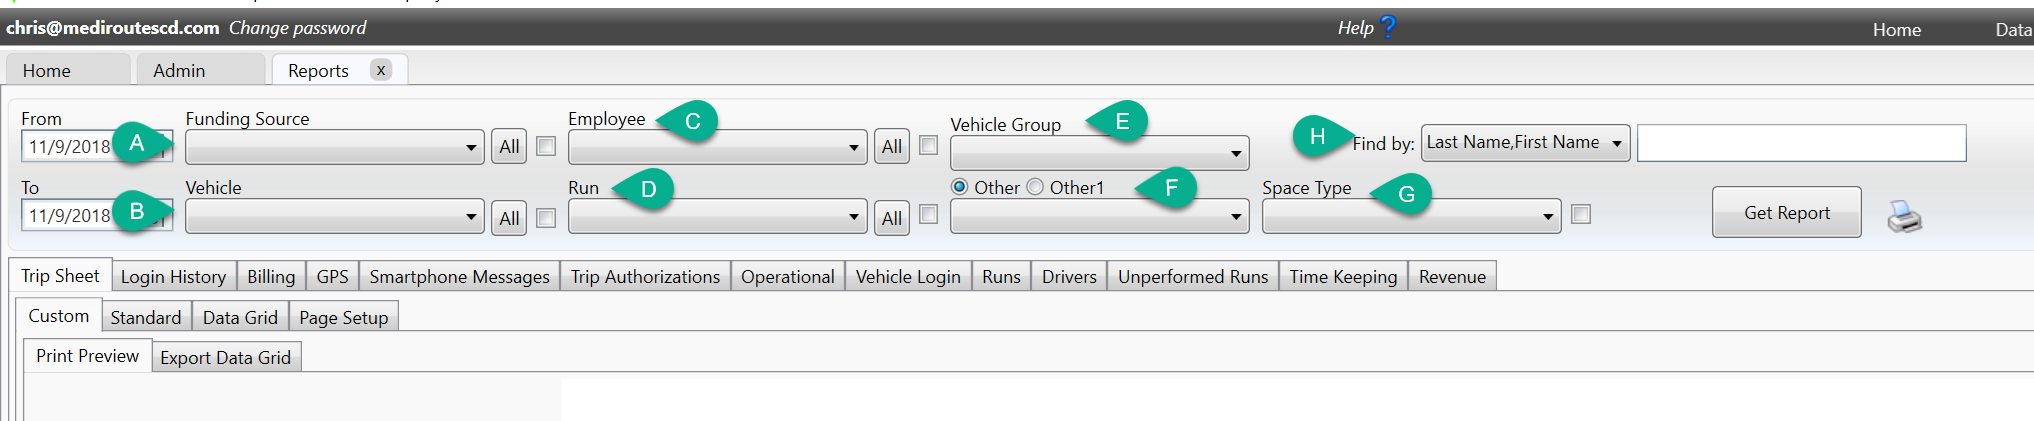
Step 5 - Optional Trip Sheet Filters
These filters can be used if you would like. If you want your trip sheets to include all trips, do not select any filters.
A - Funding Source: Selecting a value from this list will filter your report to only show trips from the selected funding source(s).
B - Vehicle: Selecting a value from this list will filter your report to only show trips that were performed by the selected vehicle(s).
C - Employee: Selecting a value from this list will filter your report to only show trips that were performed by the selected employee(s).
D - Run: Selecting a value from this list will filter your report to only show trips that were scheduled to the selected run(s).
E - Vehicle Group: Selected a value from this list will filter your report to only show trips that were performed by the vehicles in the selected group(s).
F - Other/Other1: Selecting a value from this list will filter your report to only show trips that have the selected other or other1 values.
G - Space Type: Selecting a value from this list will filter your report to only show trips that have the selected space type(s).
H - Customer Filter: Searching for a customer from this list will filter your report to only show trips from the selected customer.
Revised Date: 1/19/25 ARB