![MicrosoftTeams-image6f6e78ac5251452f5e9d5419521926001b2457277276701c3aff0c935893efe05f359183e579e81145254f68fa804b37b1631dcaf07986d136aeb8e94ed62bd3.png]](https://support.mediroutes.com/hs-fs/hubfs/MicrosoftTeams-image6f6e78ac5251452f5e9d5419521926001b2457277276701c3aff0c935893efe05f359183e579e81145254f68fa804b37b1631dcaf07986d136aeb8e94ed62bd3.png?height=50&name=MicrosoftTeams-image6f6e78ac5251452f5e9d5419521926001b2457277276701c3aff0c935893efe05f359183e579e81145254f68fa804b37b1631dcaf07986d136aeb8e94ed62bd3.png)
Step 1 - Creating Your Import File
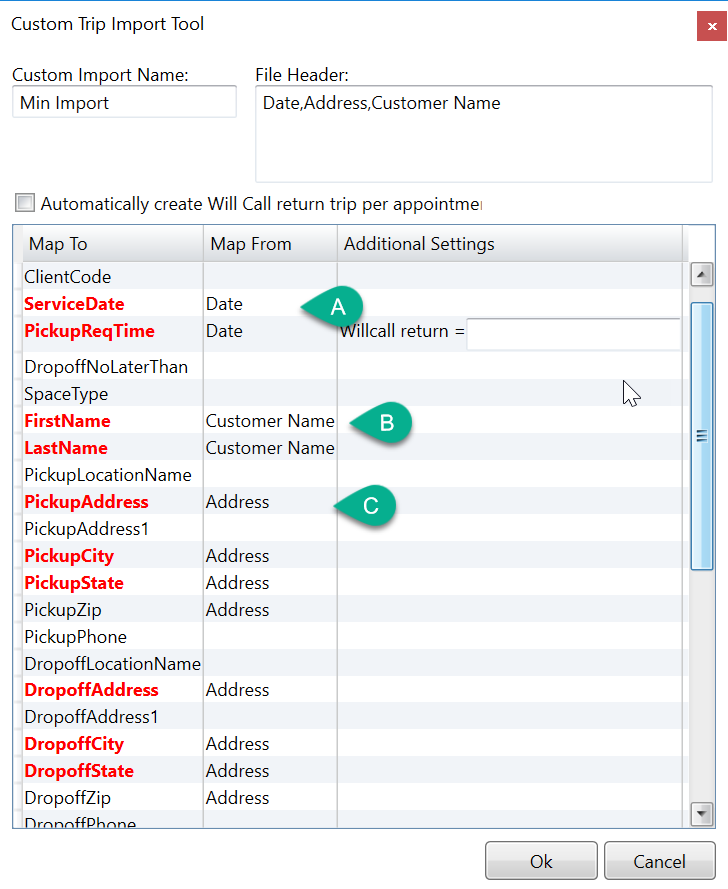
At a minimum, the following fields are required for customer import:
A - Trip Date
The date should be set for at least a year prior to your start date with MediRoutes. This will ensure that none of trips imported will impact reporting or any other part of the system.
B - Customer Address
Customers home address should be all in separate fields or combined into a single field.
C - Customer Name
Can be combined into a single field
Step 2 - Map Additional Fields and Save Import
There are several other fields that can be mapped to a customer import as long as they are included on your file. None of these fields are required, however a couple of them are highly recommended.
A - Client Code (recommended)
The client code is a unique ID for the Customer. Medicaid IDs, Broker IDs or other Healthcare ID's generally go in this field.
B - Space Type (recommended)
Unless all customers share a single space type, it is highly recommended to include the space type.
C - Date of Birth (DOB)
D - Gender
E - Home Phone
F - Language
G - Mobile Phone
H - Email
I - Once all required fields have been mapped, press OK o save your mapping.
If you have a file with Separate Funding Source per Client being added, you can Map a Columns with that Funding Source value as well, and the Funding Source on the fill will show up in the Master Client Record. But make sure Funding Source name on the file, per trips, is EXACT match to what you have in MediRoutes, if not exact match, the Default funding source you choose at import will show up.
You will be asked a series of yes/no questions after you press OK, click yes on all of them.
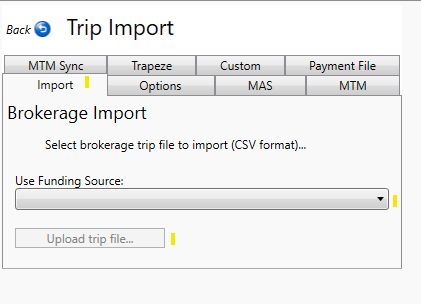
Step 3 - Import Customers
- On home tab, choose Trip Import icon.
- Pick a Funding source, and upload the Customer trip file.