Setting Up Your Vehicles
Creating Vehicles
Step 1- Navigate to Vehicles Tab and Add a New Vehicle
A – Click on the Data link.
B – Click on the Scheduling tab.
C – Click on the Vehicles tab.
D - Click on Add New to add a new vehicle.

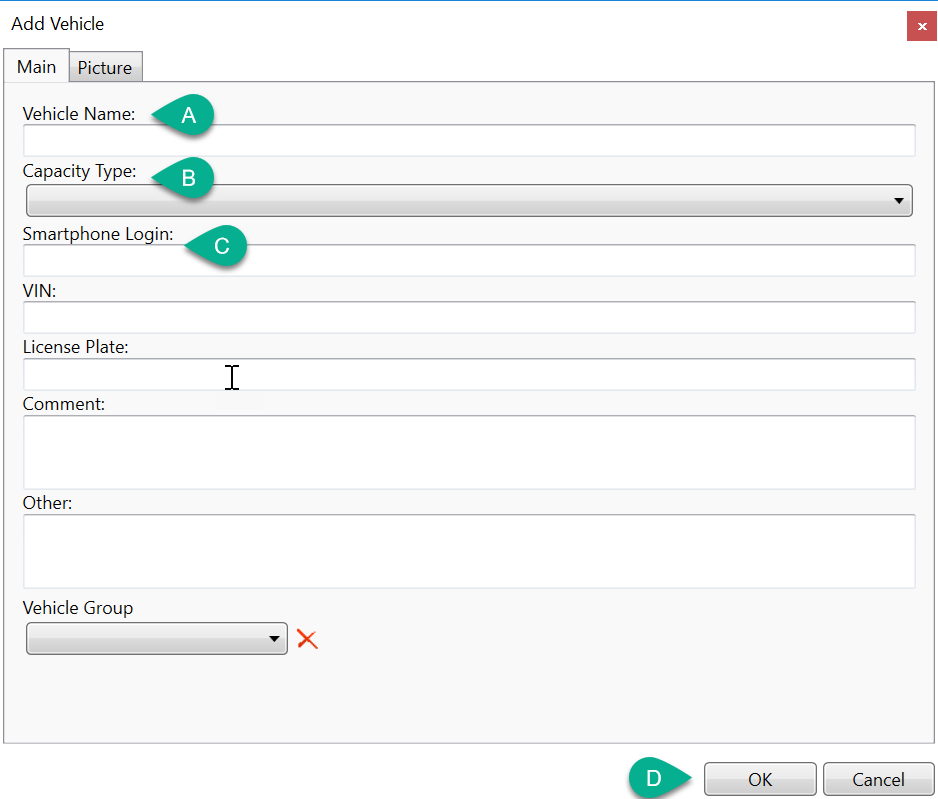
Step 2 – Configuring Your New Vehicle and Save
A – Enter the Vehicle Name
B – Use the drop down to pick the Capacity Type.
C – Enter the Smartphone Login
The smartphone login is the unique ID the driver will enter when logging into the mobile app. It is generally recommended to be the same as the vehicle name and should be unique for each vehicle.
D – Click on OK to save the vehicle information.

Step 3 – Optional Vehicle Details
You can enter other information by double clicking within the data grid and directly entering or copying the information.

![MicrosoftTeams-image6f6e78ac5251452f5e9d5419521926001b2457277276701c3aff0c935893efe05f359183e579e81145254f68fa804b37b1631dcaf07986d136aeb8e94ed62bd3.png]](https://support.mediroutes.com/hs-fs/hubfs/MicrosoftTeams-image6f6e78ac5251452f5e9d5419521926001b2457277276701c3aff0c935893efe05f359183e579e81145254f68fa804b37b1631dcaf07986d136aeb8e94ed62bd3.png?height=50&name=MicrosoftTeams-image6f6e78ac5251452f5e9d5419521926001b2457277276701c3aff0c935893efe05f359183e579e81145254f68fa804b37b1631dcaf07986d136aeb8e94ed62bd3.png)