![MicrosoftTeams-image6f6e78ac5251452f5e9d5419521926001b2457277276701c3aff0c935893efe05f359183e579e81145254f68fa804b37b1631dcaf07986d136aeb8e94ed62bd3.png]](https://support.mediroutes.com/hs-fs/hubfs/MicrosoftTeams-image6f6e78ac5251452f5e9d5419521926001b2457277276701c3aff0c935893efe05f359183e579e81145254f68fa804b37b1631dcaf07986d136aeb8e94ed62bd3.png?height=50&name=MicrosoftTeams-image6f6e78ac5251452f5e9d5419521926001b2457277276701c3aff0c935893efe05f359183e579e81145254f68fa804b37b1631dcaf07986d136aeb8e94ed62bd3.png)
MediRoutes - MTM Setup Guide
You Must have a Funding source created and saved before you can set up Brokerage API for MTM.
Link to Creating Funding source article.
Creating Funding Source in MediRoutes Desktop
Step 1 - Fill out API IDs within the brokerage tab.
Navigate to Admin => Billing => Funding Sources and Edit the MTM Funding Source using the pencil/paper edit icon.
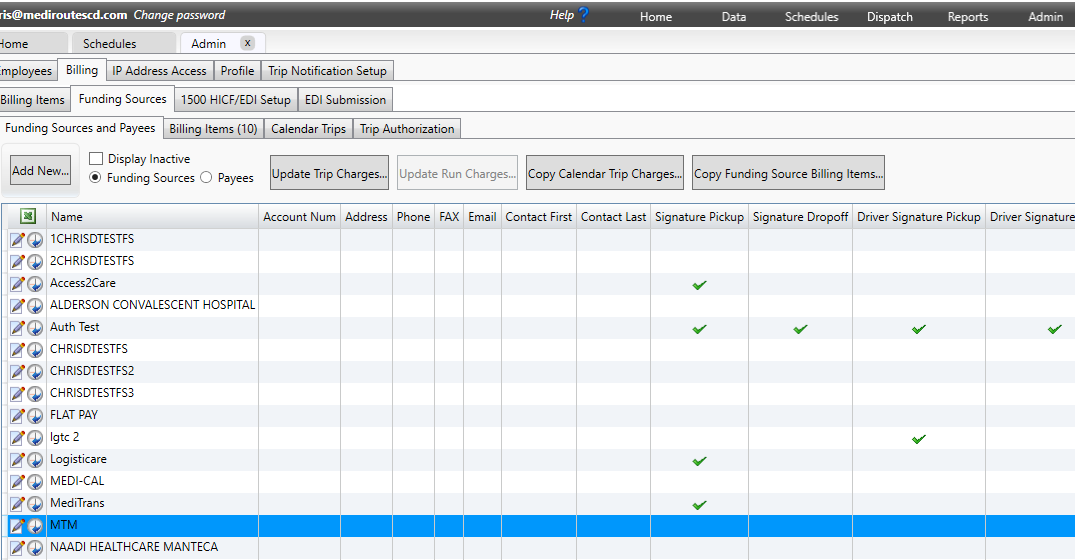
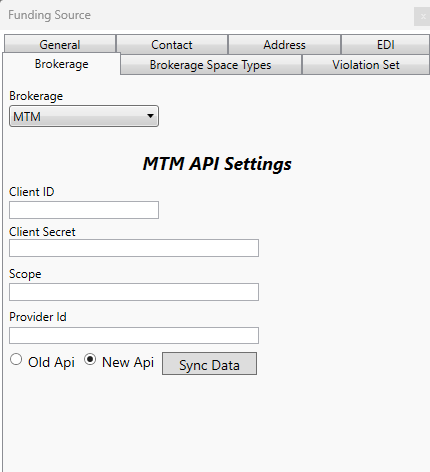
To access the MTM Api setting section, go to the Brokerage Tab within the popup window and select MTM from the Dropdown Menu. Once selected, accept the Grant access option by checking the corresponding box. This will open the MTM Api setting section.
Within the MTM API Settings, click on "New Api".

Refer to the email you received from MTM and enter the Client ID, Client Secret, Scope, and Provider ID into the designated fields on the screen.
- If you did not receive a Scope in your email from MTM, use API.API1
- If there is no Provider ID provided in the email, take the numbers at the end of the Client ID and input them in the Provider ID area. For example, if your Client ID is MTM_1234, then 1234 would be your provider ID.
After entering all the necessary information, click on Sync Data. This action will ensure that all MTM rips for the current date and future dates are synchronized with the MTM web portal.
If no Scope on email from MTM, then use api.api1
If no Provider ID on email, then take the end of the Client ID (numbers) and put that number in Provider ID area. Example MTM_1234 where 1234 is provider id.
- If the icon just spins after hitting Sync Data, that means you have no trips on MTM web portal yet, so Nothing to Sync with MediRoutes.
- Click Ok, and OK on pop up message (see below) to activate the MTM api, even without any trips to SYNC.
