Safe Ride Broker Trip File Format Set Up
A guide on exporting trip files from the SafeRide portal
Safe Ride Broker Trip File Format Set Up
Safe ride is a NEMT broker, and on their web portal, they have two different ways to get a trip file or CSV file that can be used to import trips into Mediroutes Desktop. This file requires setting up a Custom Import file format in order for importing to work in MediRoutes Desktop.
To setup your Custom Import file format, use the article below.
Creating Custom Imports File Format
If you have trouble with this setup or run into issues, please contact MediRoutes Support.
Live Rides Export
On the Safe Ride web portal, the first file export that can be used is in the Live Rides area.
- Click on Live Rides area on web portal.
- Click Export.
- Choose today's or tomorrow's date. (This export is only available for today's trips or tomorrow's trips, no other future or past dates available.)
- Export and save the file to your computer.
![]()

Export Rides
MediRoutes has no access to the Safe Ride portal and can only provide limited information on the Export Rides setup. If you have any questions on this setup, please contact SafeRide.
- Under Export Rides, open the section to Create a template, or use an existing template.
- A Date Range is available for future dates past tomorrow's trip date (see below).
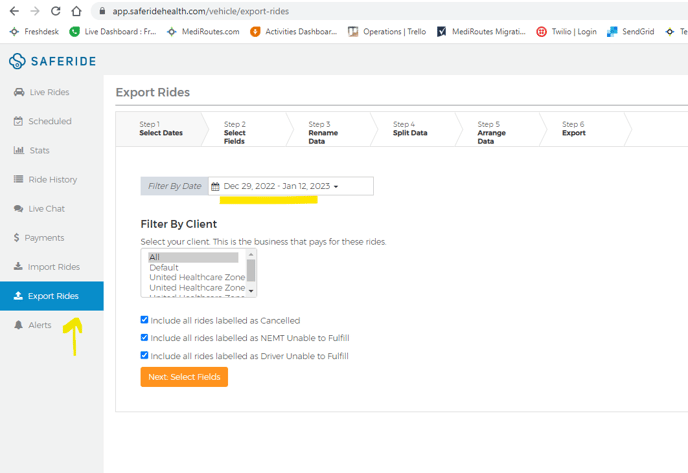
- Do not put the Additional Passenger field on the template columns.
- For a new template, follow the web portal instructions on the steps to pick the columns/fields you want on the file.
Tip: Always keep your columns on the Export Rides template the same. If you change the columns on the template or change the order of the columns, then a new Custom Import format will have to be setup in your MediRoutes Desktop.
- Make sure to have all fields that are needed to create a trip in Mediroutes, such as the Date, Passenger Name, Pick-up and Drop-off address, Pick-up and Appointment times, Space Type, etc.
- Make sure to Split the address fields. See example screenshots below (Step 4 in Export Rides template creation). The Split Data step will give you the option to split the address, which must be done in order for the addresses to be accepted in MediRoutes. You Must name each column for the address split, to a different name or value so that is not the SAME as any other column name. All columns MUST be a different name/value as any other column.
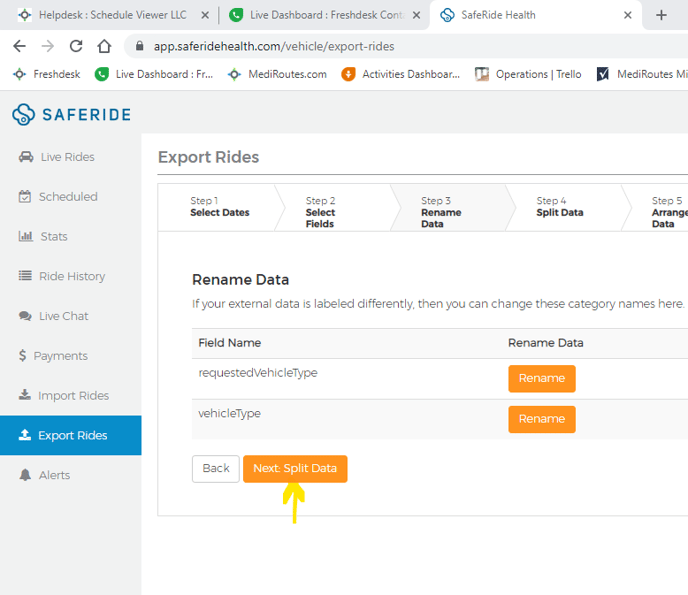
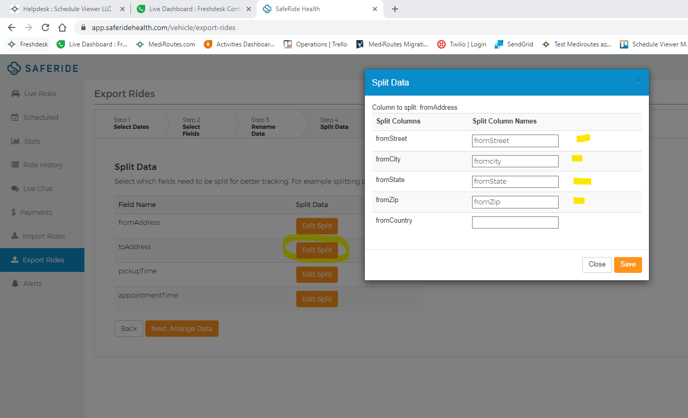
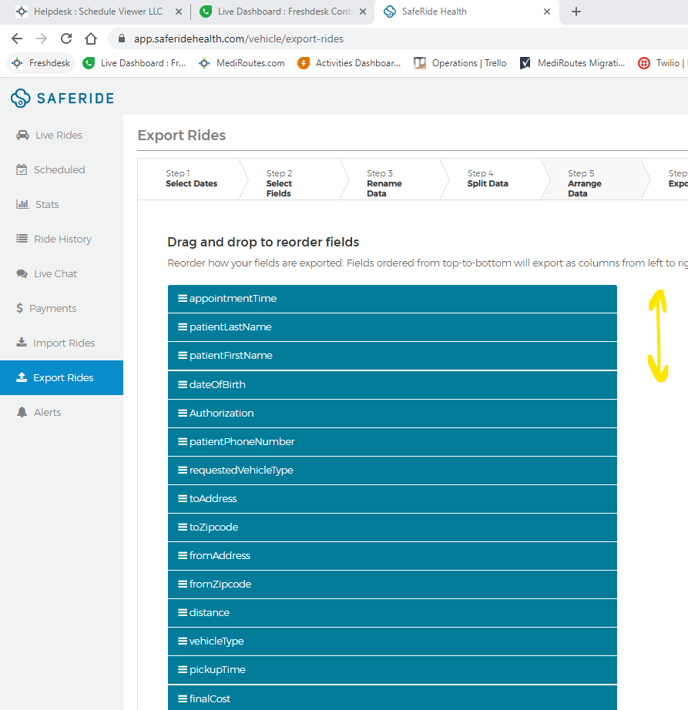
- Follow all the remaining steps in creating the template until you have the Export to email option. Remember to not make any changes to the columns on this template or the format of the columns, otherwise it will not work on import in MediRoutes since the headers will no longer match the Custom Import file format.
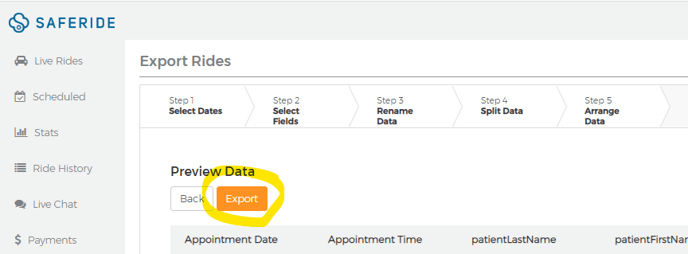
- Receive the email and download the file. Then open the file in Excel and click File > Save As > Save to save the file to your computer. This will remove any read-only, protected setting on the file from the email download, and then you are able to import the file after Custom Import mapping has been setup.
If you have any issues with custom import mapping or importing your SafeRide file, please contact MediRoutes Support.
Revised Date: 9/20/24 ARB

![MicrosoftTeams-image6f6e78ac5251452f5e9d5419521926001b2457277276701c3aff0c935893efe05f359183e579e81145254f68fa804b37b1631dcaf07986d136aeb8e94ed62bd3.png]](https://support.mediroutes.com/hs-fs/hubfs/MicrosoftTeams-image6f6e78ac5251452f5e9d5419521926001b2457277276701c3aff0c935893efe05f359183e579e81145254f68fa804b37b1631dcaf07986d136aeb8e94ed62bd3.png?height=50&name=MicrosoftTeams-image6f6e78ac5251452f5e9d5419521926001b2457277276701c3aff0c935893efe05f359183e579e81145254f68fa804b37b1631dcaf07986d136aeb8e94ed62bd3.png)